
🎧 Listen to this article: हिंदी · English · தமிழ்
🌍 Read this in your language: हिंदी · தமிழ் · తెలుగు · ಕನ್ನಡ · മലയാളം · ଓଡ଼ିଆ · 日本語 · 中文
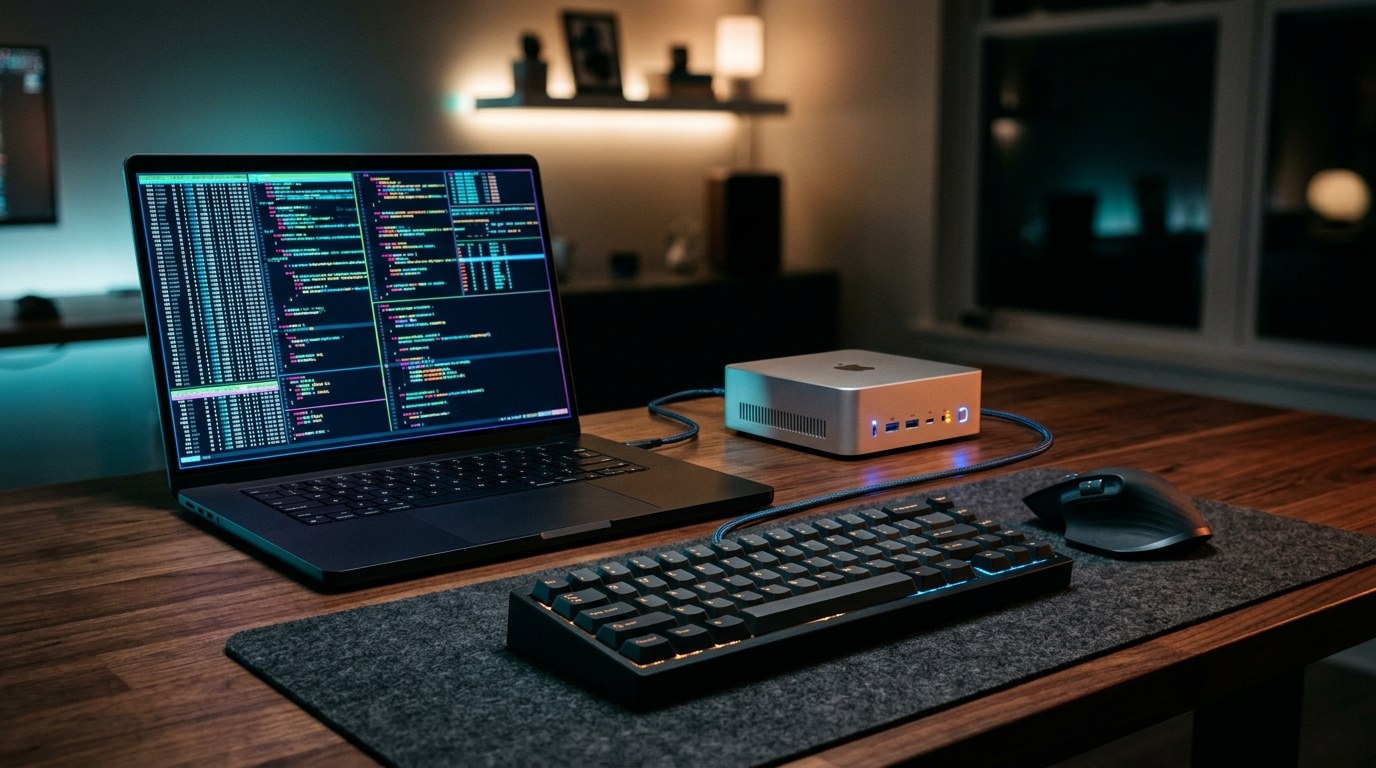
Today is October 13, 2026, and I finally finished a small project that had been half done for days: using one keyboard and mouse for two computers. One is a Linux laptop. The other is a Mac mini that lives in a corner with no monitor, which I normally reach only over SSH. The tool for the job is Deskflow, a free, open-source program that lets one computer's keyboard and mouse control other computers over the network.
The idea is simple. The reality had about a dozen hidden steps. This is a good time to write them down, because both Linux and macOS now ask for more permissions than they used to, and the error messages do not always point at the real cause. I will go slowly and explain every term the first time it appears. I will also show the real error messages I got, so that if you see one, you can search for it and find this page.
What you will learn
By the end you will know how to:
- choose the server and the client, and why that choice matters;
- draw the screen layout so the cursor crosses the edge in the right direction;
- create and trust the TLS certificates that Deskflow uses to encrypt the connection;
- grant the macOS permissions that cannot be granted over SSH;
- open the Linux firewall for your home network, and nothing else;
- start the client automatically when the Mac logs in;
- tell which of the two common failure types you have: a connection problem or a permission problem.
How Deskflow works, in plain words
Deskflow has two roles.
The server is the computer that has the real keyboard and mouse plugged in. It reads every key press and every mouse movement.
The client is a computer you want to control from the server. A small background program on the client connects to the server over the network, on TCP port 24800, and waits for instructions.
You also draw a small map that says where each screen sits. In my case the Mac is to the right of the laptop. As long as the pointer is on the laptop's screen, everything behaves normally. When the pointer reaches the right edge of the laptop screen, the server stops giving events to the laptop's programs and starts sending them to the Mac instead. The client on the Mac then injects those events locally, as if a keyboard and mouse were plugged into the Mac. Push the pointer off the left edge of the Mac and control returns to the laptop.
Three things Deskflow does not do, so you do not expect them:
- It does not show you the other computer's screen. If the Mac has no monitor, the pointer still moves onto a screen that exists only in software. You need a monitor, or a screen sharing tool, to see what you are doing there.
- It does not move files by drag and drop. It shares the pointer, the keyboard and the clipboard, and that is all.
- It does not log you in. The client program has to be running, and on a Mac with disk encryption somebody has to log in first.
What I started with
- A Linux laptop running the GNOME desktop on Wayland, with two monitors, as the server. I will call it
laptop. - A Mac mini running a recent macOS, with FileVault (disk encryption) turned on, as the client. I will call it
macmini. It has no monitor and I normally use it only through SSH, so key-only SSH logins were already set up. - Deskflow 1.27.0 already installed on both. On Linux it came from a
.debpackage, and on the Mac it is the normal application in the Applications folder. - Both machines on the same home network, and also on Tailscale, a private network that gives each machine a fixed address that does not change.
- A keyboard and mouse connected to the laptop through a USB hub.
I will use placeholder addresses throughout. 192.0.2.10 is the laptop on the home network, and 100.64.0.10 is the laptop on Tailscale. The Mac's own address, 192.0.2.20, does not need to be typed anywhere. Replace these with your own.
Before you start: know your hardware
I spent a few minutes at the start working out what keyboard and mouse the laptop actually had, because I wanted to be sure the physical devices were on the laptop and not on the Mac. Linux can tell you without any extra software.
List the USB devices:
lsusb
lsusb -t
The second command prints a tree, which shows which device sits behind which hub. In my case both wireless receivers (the small USB dongles that wireless mice and keyboards use) were plugged into the same USB hub, which in turn plugged into the laptop.
List the Bluetooth devices and read their details:
bluetoothctl devices
bluetoothctl info AA:BB:CC:DD:EE:FF
bluetoothctl info shows whether a device is paired, trusted and currently connected. My keyboard supported three Bluetooth channels, and it was paired on one channel to the laptop and on another to the Mac. That is a useful fallback: if Deskflow ever stops working, a button on the keyboard switches it to the other computer.
If you have two dongles and want to know which one is the mouse, you can count the events each device sends while you move the mouse. First find the device names:
ls -l /dev/input/by-id/Then watch one device for thirty seconds and count pointer events:
sudo timeout 30 libinput debug-events --device /dev/input/event3 | grep -c POINTERThe dongle that produced thousands of events while I moved the mouse was the mouse receiver. The other produced none. This is optional for Deskflow, but it is a neat trick for any Linux machine with several USB receivers.
Step 1: Choose a mode in the server window
My first attempt was to write the configuration files by hand and start the server from the command line over SSH. On this version of Deskflow, the server crashed with a segmentation fault as soon as the screen layout was present in the settings file. I tried with and without the headless Qt platform, and the result was the same. I stopped fighting it and used the graphical window instead.
When I opened the window, the Start button was grey and the window said "You must select a mode". I had never told Deskflow that this computer was the server. Pick the first option, the one that says "Use this computer's keyboard and mouse (make this computer the server)". The Configure Server button and an active Start button appear.
If you ever see Start greyed out, check this first. It is the most common reason that clicking Start does nothing.
Step 2: Draw the layout
Click Configure Server. A grid appears with your own computer in the middle. At the top right corner there is a monitor icon. Drag it onto the grid, placing it on the side where the other computer physically sits. I put it in the cell directly to the right of the laptop.
The new screen is called "Unnamed". Double-click it to open its settings, and give it the name the client will use. The name must match the client's computer name exactly, including the capital letters and hyphens. I used macmini. You can leave the modifier keys and the other options as they are. Click Save in that window, then Save again in the Configure Server window.
Then click Start in the main window. The status line should change to "Deskflow is waiting for clients".
Step 3: Allow the server to capture your input (Wayland)
On a Wayland desktop, programs are not allowed to read the keyboard and mouse of the whole system unless the desktop environment says so. GNOME shows a prompt when Deskflow starts the server:
An application wants to capture input events. Allow Remote Input Capturing.
Turn the switch on and click Share. This is the permission that lets Deskflow read your keyboard and mouse so it can forward them. If you deny it, the server starts but nothing ever crosses to the client.
You can confirm the server is up and listening with:
ss -ltn | grep 24800You should see a line with 0.0.0.0:24800 in the listening state.
Step 4: Give the client a certificate
Deskflow encrypts the connection with TLS, the same technology that protects web pages. Each side needs a certificate. The server creates its own the first time it runs. A client that has only ever run from the command line has none, and when I started it I saw this:
ERROR: secure socket error: tls certificate doesn't exist: .../Library/Deskflow/tls/deskflow.pem
ERROR: could not load client certificates
I created a certificate on the Mac with openssl, which is already installed there:
mkdir -p ~/Library/Deskflow/tls && cd ~/Library/Deskflow/tls
openssl req -x509 -newkey rsa:2048 -nodes -days 3650 \
  -subj "/CN=macmini" -keyout key.tmp -out cert.tmp
cat key.tmp cert.tmp > deskflow.pem && rm key.tmp cert.tmp
chmod 600 deskflow.pem
openssl x509 -in deskflow.pem -noout -fingerprint -sha256
Deskflow expects the private key and the certificate together in one file, which is why the cat command joins them. The file permission 600 means only your own user can read it, which matters because the file contains a private key. The last command prints the certificate's fingerprint, a short code that identifies the certificate. Write it down. You will compare it in the next step.
Step 5: Trust each other's fingerprints
A fingerprint is like a name tag that cannot be forged. Deskflow will not talk to a computer whose fingerprint it has not been told to trust. This is what stops a stranger on your network from pretending to be your Mac.
Server side. The first time the client connects, the server shows a window called "New client connecting". It displays a picture and a hash of the client's fingerprint. Click Show hash, and compare it with the fingerprint you wrote down in Step 4. Only click Yes if they are identical. In my case they matched character for character. After you click Yes, the server saves the fingerprint in a file called trusted-clients inside its tls folder.
Client side. The client must trust the server too. Without that, the client log fills with:
WARNING: fingerprint does not match trusted fingerprint
ERROR: failed to verify server certificate fingerprint
You can fix it by adding the server's fingerprint to a file on the Mac called trusted-servers. First read the fingerprint on the laptop:
openssl x509 -in ~/.config/Deskflow/tls/deskflow.pem -noout -fingerprint -sha256Then, on the Mac, write it in lowercase, without colons, using the v2:sha256: prefix:
printf 'v2:sha256:<64 lowercase hex characters>\n' > ~/Library/Deskflow/tls/trusted-servers
chmod 600 ~/Library/Deskflow/tls/trusted-servers
Check that the first few characters match what the server window showed, and do not skip this check. If you prefer, the graphical client can ask you to confirm the fingerprint on screen the first time, which does the same job.
Step 6: Give Deskflow permission to control the Mac
At this point the client connected and then quit immediately. The log said:
INFO: connected to secure socket
WARNING: cursor may not be visible
ERROR: failed to create quartz event tap
FATAL: process is not trusted anymore, quitting
The connection and the certificates were fine. macOS was refusing to let Deskflow read and inject keyboard and mouse events. That permission is called Accessibility, and it lives in System Settings under Privacy and Security.
This is the step you cannot do over SSH. macOS protects that list, and changing it asks for the account's password. Even a user with administrator rights cannot edit the privacy database from the command line, because System Integrity Protection blocks it. So you need to be looking at the Mac's screen, either with a monitor or through Screen Sharing, and you must type the password yourself.
Here is what to do:
- Open System Settings, then Privacy and Security, then Accessibility.
- Launch the Deskflow application on the Mac. macOS then asks "Deskflow would like to control this Mac" and adds Deskflow to the list, switched off.
- Switch Deskflow on. Type the account password when asked.
- If you also see Input Monitoring in the same area, check that Deskflow is allowed there too if keyboard input does not reach the Mac.
A trap with SSH
If you start the Deskflow client from an SSH session, macOS does not see "Deskflow" as the program asking for permission. It sees the SSH service. In the Accessibility list that appears as an entry named sshd-keygen-wrapper. You may be tempted to switch it on so the SSH-started client works. I advise against it. Turning it on gives every process that any SSH session starts the ability to read your keyboard and control your mouse, which is exactly the kind of power you do not want to hand out. Run the client from the Deskflow application and give that application the permission instead. If you have already switched the wrapper on, switch it off. Deskflow keeps working because it has its own entry.
Step 7: Start the client from the application
Open the Deskflow app on the Mac. Choose "Use another computer's mouse and keyboard (make this computer the client)". Make sure the computer name is the same as the screen name you gave in Step 2. In "Connect to", enter the laptop's address, and click Connect. A successful start shows:
INFO: connected to secure socket
INFO: server tls certificate info: /CN=Deskflow
INFO: local layouts: en
INFO: remote layouts: en
Deskflow is connected as client of 192.0.2.10
On the laptop you can confirm from the other side with:
ss -tn state established '( sport = :24800 )'A line with the Mac's address as the peer means the client is connected. Now move the pointer off the right edge of the laptop and keep pushing for a moment. Deskflow waits about a quarter of a second at an edge before it switches, so that you do not cross by accident while working near the border.
Step 8: Use the home network, not just Tailscale
I first pointed the Mac at the laptop's Tailscale address, and it worked at once. Tailscale gives each machine a fixed address and handles encryption and routing, so there is nothing else to open. But the two computers are in the same room. A direct connection over the home network has less delay, and mouse movement is very sensitive to delay. It also keeps working when the internet connection is down, which in my home happens in bad weather.
So I wanted the home network address, and the connection simply timed out. The client log showed:
WARNING: failed to connect to server: cannot connect socket
WARNING: failed to connect to server: Timed out
Two separate things were in the way.
The macOS Local Network prompt
The first message, cannot connect socket, appeared because macOS had not yet allowed Deskflow to talk to devices on the local network. The first time an application tries, macOS shows:
Allow "Deskflow" to find devices on local networks?
Click Allow. Tailscale addresses do not trigger this prompt, which is why I had never seen it. If you click Don't Allow by mistake, you can change it later in System Settings under Privacy and Security, then Local Network.
The Linux firewall
After I clicked Allow, the message changed to Timed out. That tells you the packets leave the Mac but are never answered. I tested from the Mac:
ping -c 2 192.0.2.10
nc -vz -G 4 192.0.2.10 24800
nc -vz -G 4 100.64.0.10 24800
The ping worked, the port test to the home address timed out, and the port test to the Tailscale address succeeded. That pattern points straight at a firewall on the laptop. The laptop used ufw, with the default rule "deny all incoming connections". Tailscale traffic is accepted by a separate rule, and that is why the Tailscale address had worked from the start.
You can see the rules with:
sudo ufw status verboseI added one rule that opens the Deskflow port to my home network only:
sudo ufw allow from 192.0.2.0/24 to any port 24800 proto tcp comment "Deskflow (LAN only)"The from 192.0.2.0/24 part is the important one. It means only computers on your own home network can reach the port, not the whole internet. Never open a port like this to "Anywhere" unless you understand the risk. The other rules on my laptop for remote desktop and printing already followed the same pattern, so this one fit in.
The connection came up within seconds. The log on the Mac then showed the connection from the Mac's home address to the laptop's.
Giving the client both addresses
Deskflow accepts a comma-separated list of servers and tries them in order. I set the Mac's "Connect to" field to:
192.0.2.10,100.64.0.10
This means: try the home network first, and fall back to Tailscale if that does not work. Do not put a space after the comma. When I typed 192.0.2.10, 100.64.0.10 with a space, the application quietly emptied the field and the Connect button did nothing. The settings file stores the list as a single quoted string, and that is normal.
One more tip: the home address of a laptop usually comes from DHCP, so it can change. If it does, the client falls back to Tailscale. To make the home address permanent, give the laptop a fixed address, or a reservation, in your router.
Step 9: Start the client automatically
A client that you must start by hand is not much use on a computer you never touch. Add the application as a login item. You can do this in System Settings, under General, then Login Items. If you prefer a command:
osascript -e 'tell application "System Events" to make login item at end with properties {path:"/Applications/Deskflow.app", hidden:false, name:"Deskflow"}'Then check that two settings are in place in the client's settings file, ~/Library/Deskflow/Deskflow.conf:
[core]
coreMode=1
computerName=macmini

[client]
remoteHost="192.0.2.10,100.64.0.10"

[gui]
startCoreWithGui=true
coreMode=1 means client, startCoreWithGui=true means "start the connection when the application starts", and remoteHost holds the list of servers. The app writes startCoreWithGui itself when it exits while connected.
I tested it by quitting the application and launching it again. About fifteen seconds later the client had connected on its own, with no clicks.
There is one limit. With FileVault turned on, the Mac cannot start your login items until somebody logs in at the login screen after a restart. If you restart a remote Mac, use sudo fdesetup authrestart, which restarts the Mac and signs in automatically once, so the login items run.
How to move between the computers
With the Mac on the right of the laptop, use these directions:
- To go from the laptop to the Mac, push the pointer off the right edge of the laptop screen.
- To come back, push the pointer off the left edge of the Mac's screen.
- If the pointer does not switch, press Scroll Lock. By default Deskflow uses Scroll Lock to lock the pointer to the computer it is on. Press it again to unlock.
- If the layout is wrong for you, change it in Configure Server on the laptop. You can put the Mac on any side, or above and below.
A table of the problems I met
| What you see | What it really means | What fixed it |
|---|---|---|
| Start button is grey, "You must select a mode" | No server or client option is chosen | Pick the server option in the window |
unknown computer name in the layout file |
Screens are kept in the main settings file, not the layout file, in this version | Define the screens in the settings or use the graphical window |
| Server crashes with a segmentation fault at start | A bug in the headless server on version 1.27.0 when a layout is present | Start the server from the graphical window |
tls certificate doesn't exist |
The client has no certificate | Create deskflow.pem with openssl |
fingerprint does not match trusted fingerprint |
The client does not trust the server yet | Add the server fingerprint to trusted-servers |
failed to create quartz event tap |
macOS Accessibility permission missing | Turn on Deskflow in Accessibility, at the Mac's screen |
| Connect button does nothing, "Connect to" is empty | A space in the server list, or the app discarded the value | Retype it without a space |
cannot connect socket on the home network |
macOS Local Network permission not given | Click Allow on the prompt |
Timed out on the home network but Tailscale works |
The Linux firewall blocks the port from the home network | Add a ufw rule for your home network only |
A few quick checks that save time
Run these in order when something does not work. Each one answers one question.
- Is the server running?
ss -ltn | grep 24800on the server. No line means it is not listening. - Is the client running? On the Mac, look for a
deskflow-core clientprocess. - Can the client reach the server? Use
nc -vz <server address> 24800from the client. A timeout points at the network or the firewall. A refusal means nothing is listening. - Is the client's log complaining about certificates, fingerprints or permissions? Those messages are very specific, and the table above covers the ones I saw.
- Is the pointer locked? Press Scroll Lock once and try again.
Conclusion
Deskflow works well once it is running, but the setup is mostly about permissions and trust, not about the program itself. Choose a mode, draw the layout, give the client a certificate, trust fingerprints on both sides, grant the macOS permissions at the Mac's own screen, open the firewall for your home network only, and add the application as a login item. Do those in order and the cursor crosses smoothly between a Linux laptop and a headless Mac. Most of the time I lost was spent on messages that looked like connection problems but were really permission problems, so reading the log message carefully is the best habit to take away from this.
Merits
- Free and open source, with one keyboard and mouse for both computers.
- Encrypted with TLS, with a fingerprint check so a stranger cannot join.
- Shares the clipboard, so copy and paste work across machines.
- Works over a home network and over Tailscale, and a fallback address is easy to add.
- The client can start automatically at login, so a headless Mac needs no attention.
- Uses very little of the computer's resources.
Demerits
- Several permissions can only be granted at the Mac itself, not remotely, and they need the account password.
- On Linux with Wayland, the graphical setup needs a permission prompt, and the command-line server was unreliable for me on this version.
- It does not show the other computer's screen or move files by drag and drop.
- A client on a FileVault Mac does not start until someone logs in after a restart.
- Error messages can look like network faults when they are really permission faults, so diagnosing takes patience.
- Strict firewalls need a rule, and a wrong rule can open more than you intended.
Caution
This article is for learning. Replace every placeholder address, hostname and name with your own, and never share your real certificate, private key, fingerprints or passwords. Settings screens, prompts, file locations and command names can differ between Deskflow, Linux and macOS versions, so check each step against your own system before relying on it. Open firewall ports only for networks you trust, and avoid giving remote-access programs more permission than they need. Verify every claim here on your own setup before using it for anything important.
Frequently asked questions
- Can Deskflow share files by drag and drop? — No. It shares the pointer, the keyboard and the clipboard. For files, use a copy tool such as
scp, a shared folder or a sync tool. - Why does my cursor not cross to the other computer? — Common causes are no mode selected, the client not connected, a missing macOS permission, a locked cursor, or a firewall blocking port 24800. The server and client logs show which one it is.
- Why does the client say the fingerprint does not match? — The client has not been told to trust the server yet. Add the server's SHA-256 fingerprint to its trusted-servers file, after comparing it with the real one.
- Do I need the Accessibility permission on the Mac? — Yes. Without it macOS stops Deskflow from reading or injecting keyboard and mouse events, and the client quits right after it connects.
- Can I grant the macOS permissions over SSH? — No. The privacy settings are protected by the system and need the account password at the Mac's own screen or through screen sharing.
- Does Deskflow work over Tailscale? — Yes. Use the server's Tailscale address in the client. A home-network address is faster when both machines are in the same place, so list it first.
- Is it safe to open port 24800 in the firewall? — Only if you limit it to your own network, for example with a rule such as allow from your home subnet. Do not open it to the whole internet.
- How do I switch back from the Mac to Linux? — Push the pointer off the edge that faces the other computer. If it does not switch, press Scroll Lock, which locks or unlocks the cursor to one machine.
- Will it start by itself after a reboot? — If you add it as a login item and the Mac logs in. With FileVault, someone must log in first, or you can restart with an authenticated restart.
- Is the connection encrypted? — Yes, with TLS, and each side checks the other's fingerprint before trusting it.
Tags
#deskflow #linux #macos #homelab #tailscale #kvm #wayland #sysadmin #remoteaccess #opensource
Docker Security Checklist
Lock down your containers from build to runtime — 29 practical controls covering images, runtime flags, secrets, and the daemon. Enter your email — you'll get the PDF instantly, plus new posts on Docker, Linux & security.
Free. No spam — unsubscribe in one click.
Responses
Sign in to leave a response.